10 Critical Truths About Cat Stool Samples: Can a Cat Stool Sample Have Litter on It? (What Vets Won’t Tell You)

Collecting a stool sample from your cat seems simple… until the moment you realise there’s litter stuck to it, scattered around it, or mixed inside it. And suddenly the panic begins:
Can a cat stool sample have litter on it? Will the vet reject it? Will the test still work?

These are real worries, and every cat owner faces them at least once. The truth is this: even the smallest mistake can affect lab accuracy, parasite detection, and even force a retest. That means extra cost, extra stress, and delayed treatment for your cat.

Vets don’t clearly explain—how to collect a clean sample, what happens if litter gets in, which litters affect lab tests, and how tools and methods compare. You’ll also learn why certain products make stool collection easier and why some create more contamination.

Before we begin, here’s the biggest curiosity hook:

There is ONE type of cat litter that almost guarantees your stool sample will get rejected—and chances are, you’re using it right now.

Let’s start with the foundation: collecting a clean sample the right way.

I write with love and care, keeping your furry friend’s health first and following the doctor’s guidance. If it helps, share it—because health and knowledge grow stronger when we share them within our community. My words are carved in stone — I truly worship my cat. Everything I share with you here comes straight from my cat’s own wisdom. That’s why I encourage you to share this blog as much as possible! Also, let me tell you — this is a top-quality blog, so make sure to read it completely to get the most benefit and keep your cats happy and healthy. A cat is the light that brightens every home.

How to Collect a Clean Cat Stool Sample Without Litter Contamination

Collecting a clean cat stool sample sounds easy… until you actually try it. Most cat parents discover the same problem: the stool touches litter, picks up grains, absorbs dust, or breaks apart while scooping. And because stool testing requires accuracy, even a small amount of litter can interfere with parasite detection, bacterial analysis, and lab integrity.

This section gives you a vet-level, step-by-step guide on how to collect a stool sample with zero or minimal litter contamination, while comparing different methods so you can choose the safest option for your home.

Why a Clean Sample Matters More Than You Think

A clean sample isn’t just for neatness—it directly affects how your vet reads the results. Litter contamination can:

  • Break stool texture and cause false negatives
  • Hide Giardia cysts, roundworm eggs, or Coccidia oocysts
  • Absorb moisture and change the chemical composition
  • Introduce foreign particles into the lab equipment
  • Force a retest that costs both time and money

This is why vets often say, “Try your best to bring the stool as clean as possible.”

3 Best Ways to Collect a Clean Cat Stool Sample (Ranked + Compared)

Below is the comparison table of the three safest and most reliable collection methods used by cat owners, technicians, and veterinarians:

MethodCleanliness ScoreRisk of LitterBest ForDifficulty
Litter-Free Tray Method ExcellentZeroPerfect sampleEasy
Disposable Glove Method Very GoodLowNervous catsEasy
Scoop Method (Traditional)GoodMediumQuick collectionModerate

Let’s break them down so you know exactly how each method works.

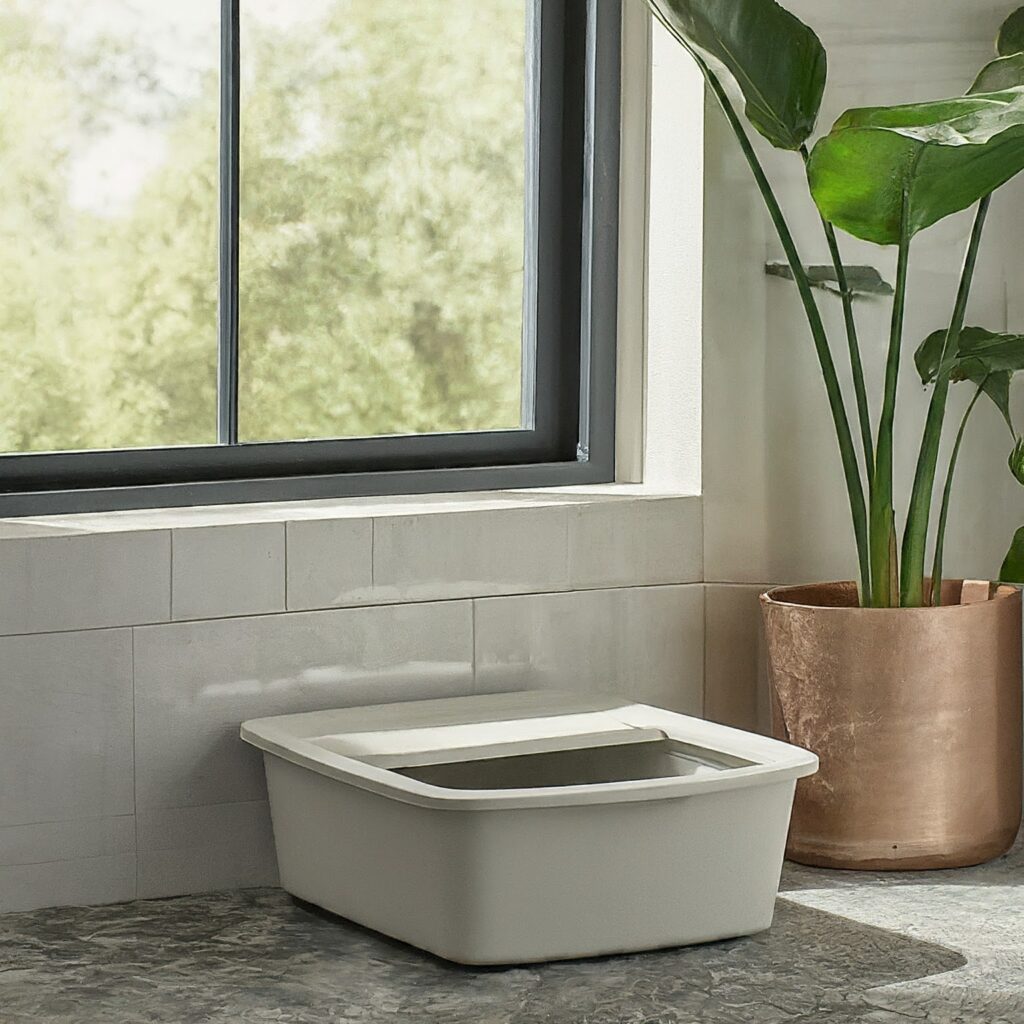
Method 1: Litter-Free Tray Method (The Vet-Preferred Technique)

This method gives the cleanest, 100% litter-free sample and is recommended for parasite testing, PCR panels, and Giardia-specific tests.

How It Works

You place a shallow, disposable tray or litter box liner inside your cat’s litter area. The cat still thinks they are using the litter box, but instead of the stool landing on the litter, it lands directly on the tray.

Steps

  1. Take a shallow aluminium, plastic, or paper tray (even food-grade trays work).
  2. Place it on top of the litter layer, covering only part of the box so your cat doesn’t feel nervous.
  3. Wait for your cat to poop within the next 12–24 hours.
  4. Remove the stool using a sterile scoop or gloves.
  5. Transfer to a veterinary sterile sample cup.
  6. Keep in a cool environment until delivering to your vet.

Why It Works Best

  • No litter touches the stool
  • No dust, silica, or clay absorbs moisture
  • Stool shape and texture remain unchanged
  • Perfect for delicate tests like faecal flotation, wet mounts, and PCR panels

If you’re dealing with a cat who refuses to cooperate with a tray, try this next method.

Method 2: Disposable Glove Method (Low Risk, High Control)

This method works well for cats that prefer privacy or are picky about their litter box setup.

How It Works

You simply wear gloves, pick up the stool directly with your hand, and avoid scooping up litter.

Steps

  1. Put on disposable gloves (latex-free preferred).
  2. Gently lift the stool while avoiding contact with the surrounding litter.
  3. Shake lightly to remove small grains that might cling.
  4. Place the stool into the sterile container.
  5. Seal and label (cat name, date, time).

Why It’s Effective

  • Direct hand control reduces contamination
  • Perfect for a firm stool
  • The best method when using clumping litter, because scoops tend to drag grains along

Limitations

  • Soft or loose stool is harder to pick up cleanly
  • Cats may not allow you to approach immediately

If the glove method feels tricky, the scoop method is your next fallback.

Method 3: The Scoop Method (Traditional but Requires Care)

This is the most common method used by cat parents, but also the most likely to introduce litter contamination if done incorrectly.

How It Works

You use a small scoop or spatula to lift the stool out of the litter box.

Steps

  1. Use a flat-edged scoop, not a slotted one.
  2. Slide the scoop under the stool in one slow motion.
  3. Gently tilt to release loose grains.
  4. Place the sample into your sterile cup.
  5. Double-bag the container to avoid contamination spills.

Tips to Reduce Contamination

  • Avoid digging into the litter
  • Target stool that sits on top of the litter, not buried
  • Never use a dirty or old scoop
  • Avoid clumping litter if possible, because particles stick easily

Pro-Level Techniques to Guarantee a Cleaner Sample

Even if you use the best method, these extra techniques dramatically increase your chances of a clean sample:

1. Switch to Biodegradable Litter for 24 Hours

Litters like pine, corn, or paper pellets do not stick to stool, making them ideal for sample collection days.

2. Line the Litter Box with Plastic Wrap or Foil

This is a trick used by shelter workers:

  • Tape a layer of plastic wrap over half the litter box
  • Pour a thin layer of litter under the wrap
  • Cat still feels like they’re digging, but stool lands on the wrap

3. Watch the Litter Box Routine

Cats usually poop on a schedule. If you know the timing, you can collect the stool immediately before it touches litter.

4. Use a Secondary Temporary Box

Set up a clean, empty litter box for one-time use.
Cats will often use it if placed beside their usual box.

5. Keep the Sample Fresh

The fresher the sample, the lower the risk of contamination from the box environment.

What to Avoid (Most Common Contamination Mistakes)

  • Scooping too aggressively
  • Using a slotted scoop
  • Collecting old stool
  • Allowing the stool to roll in litter
  • Using contaminated containers or kitchen plastic
  • Mixing multiple stool pieces (bad for accuracy)

When You MUST Have Zero Litter (Non-Negotiable Situations)

Some tests are extremely sensitive and require a perfectly clean sample:

  • Giardia antigen test
  • Coccidia examination
  • PCR stool panels
  • Bacterial culture tests
  • Feline diarrhoea diagnostics

If your vet orders these tests, always use the litter-free tray method for best results.

What Happens If Your Cat’s Stool Sample Contains Litter at the Vet Lab?

Most cat parents don’t realize this, but even a tiny amount of litter mixed into a stool sample can completely change what happens inside the vet lab. When your sample reaches the technician’s bench, it goes through a series of delicate steps—each designed to detect parasites, eggs, bacteria, viruses, and digestive abnormalities. Any foreign material, especially clumping litter, can interfere with these tests in ways many people never learn until a vet explains it.

Below is a clear, real-life breakdown of what actually happens behind the scenes when your cat’s stool sample contains litter, and why vets sometimes accept it—and sometimes don’t.

1. The Vet Lab First Assesses the Sample Quality

The first thing a lab technician checks is the overall condition of the stool:

  • Freshness
  • Texture
  • Moisture level
  • Presence of debris
  • Visible litter contamination

If the sample has only a dusting of non-clumping litter, labs usually proceed.
If it contains clumps, hardened granules, or scented crystal pieces, they may need to stop right there.

This first assessment decides whether the sample is usable or contaminated.

2. Litter Can Disrupt the Flotation Process (The Most Common Test)

Most parasite tests rely on a delicate method called a faecal flotation test. A solution is added that causes parasite eggs to rise to the surface, where they can be inspected under a microscope.

But here’s the problem:

Clumping litter absorbs the flotation solution.

This makes the mixture:

  • too thick,
  • uneven,
  • or impossible to view clearly.

So if your sample contains clumping litter, the flotation chamber may fail to separate parasite eggs, leading to:

  • False negatives
  • Missed parasite infections
  • Inaccurate or incomplete results

Your vet can only make decisions based on what the lab sees, so a contaminated sample can delay diagnosis.

3. Crystal Litter Can Damage Microscopic Equipment

If your cat uses silica gel (crystal litter), the tiny shards can scratch:

  • microscope slides,
  • lenses,
  • or flotation chambers.

Labs sometimes reject these samples immediately because crystal litter can:

  • distort microscopic images,
  • create false “artefacts,”
  • break equipment worth thousands.

So even if the stool is perfect, the litter makes it unusable.

4. Scented or Chemical Litter Can Mask Bacterial Growth

Bacterial stool tests require a natural, uncontaminated sample to allow specific bacteria to grow in controlled conditions.
However, many scented or deodorised litters contain chemicals that can:

  • kill bacteria,
  • change pH levels,
  • disrupt cultures,
  • or create false microbiome readings.

This means your vet may not get an accurate picture of digestive issues like:

  • bacterial imbalance,
  • vomiting causes,
  • chronic diarrhoea,
  • or poor nutrient absorption.

5. Labs Sometimes Need to Request a Fresh Sample

If the litter content is too high—or the test type is sensitive—your vet may need to request a fresh, litter-free sample.

They’ll usually tell you:

  • Why the sample failed,
  • What kind of litter caused issues?
  • and how to prepare the next sample correctly.

This adds time, extra cost, and delays in treatment.

6. Mild Litter Contamination Is Sometimes Acceptable

Here’s the part most owners don’t know:

Labs can and often do analyse lightly contaminated samples, especially for:

  • routine parasite checks
  • simple visual exams
  • basic screenings

If the litter is unscented, non-clumping, and only lightly dusted, technicians can often work around it.

So, contamination doesn’t always mean “automatic rejection.”

7. The Final Interpretation May Be Limited

Even if the lab accepts the sample, the report may include notes like:

  • “Debris interfered with examination”
  • “Foreign material obstructed parasite detection”
  • “Sample quality suboptimal”

These warnings help vets interpret results cautiously.

8. Contaminated Samples Can Delay Diagnosis

This is the part that pet parents actually feel the most:

  • Delayed treatment
  • Repeat sample requests
  • Extra transport time
  • Additional vet fees

For cats showing symptoms—vomiting, diarrhoea, worms, poor appetite—time matters. A compromised stool sample slows everything down.

The Bottom Line: What Readers Need to Know

When a cat stool sample contains litter, the vet lab may:

  • Accept it (if minor contamination)
  • Try to salvage it (but results may be limited)
  • Reject it (if clumping, crystal, or excessive litter is present)

Understanding what actually happens inside the lab helps cat owners realise why clean collection matters, how to avoid sample rejection, and how to help vets diagnose faster.

Can a Cat Stool Sample with Litter Still Be Used for Parasite Testing?

Collecting a Fecal Sample from Your Cat.mp4

Many cat owners panic the moment they notice a few grains of litter stuck to their cat’s stool sample—but the truth is more nuanced. Whether a litter-contaminated sample can still be used for parasite testing depends on three main factors: the type of litter, the amount of contamination, and the specific parasite test your vet plans to run.

Let’s break it down in a way that helps you understand exactly what vets accept, what they reject, and why.

1. Yes—Light Contamination Is Often Still Usable for Basic Parasite Detection

If your sample only has a few specks of unscented, non-clumping litter, most vet labs will still run the test. This is because common parasite tests—especially fecal floatation—focus on identifying:

  • Roundworm eggs
  • Hookworm eggs
  • Tapeworm segments
  • Whipworm eggs
  • Giardia cysts
  • Coccidia oocysts

These structures can still be visible under the microscope even if tiny debris is present.

Good news:

A lightly contaminated sample can still detect the most common parasites.

2. But Clumping Litter Is the Biggest Problem

Clumping litter causes two major issues:

A. It absorbs the flotation solution

This is the liquid used to isolate parasite eggs.
If clumping litter absorbs it, the surface layer becomes cloudy and unusable.

B. It traps parasite eggs

Parasite eggs can get stuck inside wet clumps, making the sample look “negative” even when parasites are present.

This leads to:

  • False negatives
  • Missed infections
  • Inaccurate test results

So if your cat’s stool sample has chunks of clumping litter, labs may reject it or request a new sample.

3. Crystal (Silica) Litter Often Makes the Sample Unusable

Silica litter is sharp, shiny, and reflective. Under a microscope, it creates:

  • Light glare
  • Shattered crystal particles
  • Foreign reflections

These “artefacts” can block parasite eggs or mimic them, making the test unreliable.

If only 1–2 crystals are present, labs may continue

If the sample is coated with crystals, it’s unusable

4. Scented Litter Can Interfere with Certain Parasite Tests

Many scented or deodorised litters contain:

  • anti-odor chemicals
  • baking soda
  • perfumes
  • antibacterial agents

These compounds can damage parasite eggs or alter stool chemistry.
This makes the sample harder to read and can interfere with Giardia antigen or PCR testing.

5. Some Parasite Tests Are More Sensitive Than Others

Different parasite tests tolerate contamination differently:

A. Faecal flotation

Some contamination is acceptable → Most common test
Light litter OK
Heavy litter → Not OK

B. Faecal smear

Lab spreads the stool directly on a slide
Even a little litter can scratch slides or mask parasites

C. ELISA antigen tests (Giardia snap tests)

These detect parasite proteins
Small debris is OK, but chemicals from litter can interfere

D. PCR testing (DNA testing)

Extremely sensitive
Requires a clean stool sample
Most labs reject contaminated samples

So whether the sample is usable depends on the test your vet orders.

6. Parasites Are Often Found Near the Outer Layer of the Stool

Even if litter is stuck on the outside, labs can sometimes take a sample from the center, where parasite eggs are still detectable.

This means:

✔ A small amount of debris doesn’t always ruin the test
✔ Technicians can “work around” the contamination

This is why many vets say:
“Bring whatever fresh sample you can get—we’ll check if it’s usable.”

7. Too Much Litter = Too Much Work for the Lab

If the sample contains:

  • large clumps
  • heavy debris
  • soaked litter
  • multiple crystal fragments
  • or chemical-scented litter

The lab may spend too much time trying to separate usable material.
In these cases, the technician will often:

  • Reject the sample
  • Call your vet
  • Request a fresh stool sample

This delays diagnosis—especially for kittens and sick cats who need fast treatment.

8. Your Cat’s Symptoms Also Influence the Decision

If a cat shows:

  • chronic diarrhea
  • sudden weight loss
  • visible worms
  • bloody stool
  • vomiting
  • lethargy

Then, vets may attempt to process even a lightly contaminated sample because waiting another day could worsen the condition.

In urgent cases → Labs try harder

In routine checks, → Labs may request a fresh sample

The Bottom Line for Cat Parents

A cat stool sample with litter can still be used for parasite testing if:

  • It’s only a small amount
  • The litter is non-clumping
  • No crystals or harsh chemicals are present
  • The test type isn’t extremely sensitive

A sample cannot be used if:

  • It has clumping litter chunks
  • It contains silica crystals
  • It’s heavily coated in debris
  • It’s needed for PCR or culture-based tests

The safest rule?

Try to provide the cleanest sample possible—but don’t panic if a little litter sticks. Vets deal with this every day.

Can Clumping Litter Affect Cat Stool Test Results?

For most cat parents, clumping litter feels like the perfect convenience—easy to scoop, cleaner to manage, and excellent at controlling odor. But when it comes to veterinary stool testing, clumping litter can become a hidden problem. Many owners are shocked to learn that even a small amount of clumping litter stuck to a stool sample can dramatically affect test results.

Understanding why this happens gives you more control when preparing your cat’s sample and helps you avoid inaccurate readings, repeat tests, or delayed treatment.

Let’s break down exactly how clumping litter interferes with the most important stool diagnostics.

1. Clumping Litter Absorbs the Liquid Needed for Testing

Most parasite screenings use a technique called faecal flotation, where a special solution is added to the sample to separate parasite eggs from waste.

Here’s the issue:

Clumping litter is designed to absorb moisture instantly.

So when it comes into contact with the flotation solution:

  • The solution thickens
  • The mixture becomes grainy
  • Parasite eggs cannot float properly
  • The viewing layer becomes cloudy

This leads to poor visibility, making it harder or even impossible to detect:

  • Roundworm eggs
  • Hookworm eggs
  • Whipworm eggs
  • Coccidia oocysts
  • Giardia cysts

Result?

The test may come back negative, even if your cat has parasites.

2. Clumps Trap Parasite Eggs Inside Them

Clumping litter forms a solid mass around moisture. When stool has even a bit of wetness, litter begins to bind to it immediately.

This does two things:

A. Traps parasite eggs inside hardened clumps
B. Prevents eggs from mixing with the flotation solution

Technicians need the eggs to detach and rise to the surface. Clumped samples make this nearly impossible.

This is one of the biggest reasons why labs often say:

“We need a fresh sample without clumping litter.”

3. Clumping Litter Can Create False Negatives

When eggs are hidden inside litter clumps or when the solution becomes unusable, the lab technician may see zero eggs under the microscope.

This creates a false sense of security for owners:

  • They assume their cat is parasite-free
  • The vet may skip treatment
  • Symptoms may continue
  • The infection can worsen

This is especially dangerous for:

  • Kittens
  • Senior cats
  • Cats with chronic diarrhoea
  • Multi-cat homes
  • Cats with weakened immune systems

Mistakes at this stage can delay proper diagnosis and treatment.

4. Scented or Chemical Clumping Litters Interfere Even More

Most clumping litters (especially scented ones) contain:

  • Perfumes
  • Anti-odor agents
  • Baking soda
  • Anti-bacterial additives

These chemicals can affect test results by:

  • Damaging parasite eggs
  • Altering stool pH
  • Killing living organisms is needed for identification
  • Masking certain parasite structures
  • Interfering with Giardia antigen tests

When litters with additives contaminate a sample, labs often reject it immediately.

5. Some Labs Can Work Around Light Contamination—but Not Always

A few grains of unscented clumping litter might be manageable.
Experienced technicians sometimes remove debris manually and salvage the sample.

BUT…

Heavy contamination, large chunks, or soaked clumps make the sample:

  • too dense
  • too sticky
  • too chemically altered
  • too unreliable

In these cases, labs will request a new sample to ensure accuracy.

6. Clumping Litter Can Hide Parasites Visible to the Naked Eye

Clumping litter can easily bury or break apart:

  • Tapeworm segments
  • Worm fragments
  • Larvae
  • Mucus patterns
  • Blood streaks

These visual clues often give the vet early insight.
If buried in litter, those signs disappear completely.

Another way clumping litter creates false negatives.

7. PCR Tests and Advanced Diagnostics Require a Clean Sample

PCR testing analyses the DNA of parasites, bacteria, and pathogens.

These tests are extremely sensitive and require a clean stool sample because:

  • Litter can contaminate the DNA
  • Chemicals alter genetic material
  • The machine may fail to process the sample

For advanced tests → Clumping litter is a big “NO.”

8. Why Vets Prefer Litter-Free Stool Samples

Vets recommend avoiding clumping litter for stool submissions because they want:

  • Accurate readings
  • Fast results
  • Reliable visibility under the microscope
  • Clean separation of parasite eggs
  • Uninterrupted antigen detection

A contaminated sample makes their job harder, and yours longer.

The Bottom Line for Cat Owners

Yes — clumping litter absolutely affects cat stool test results, and in many cases, it can:

  • ruin the sample,
  • cause false negatives,
  • delay diagnosis,
  • cost you extra visits,
  • and slow down your cat’s treatment plan.

Small contamination = sometimes usable

Large contamination = often rejected

Clumping litter chunks = inaccurate results

Scented or chemical litter = major interference

The best way to avoid all of this?

Try to collect the sample immediately after your cat defecates and avoid any contact with clumping litter.

Vet-Approved Tools to Collect a Litter-Free Cat Stool Sample

When it comes to collecting a clean, accurate, litter-free cat stool sample, using the right tools makes all the difference. Most cat owners assume they can just scoop a piece of poop from the litter box—but vets know that even tiny traces of litter can interfere with parasite testing, bacterial cultures, and diagnostic accuracy.

That’s why veterinarians strongly recommend using a few simple tools designed to help you pick up a cleaner, fresher, and uncontaminated sample with minimum stress—for both you and your cat.

Below is a breakdown of the top vet-approved tools, how each one works, and the exact situations where they’re most useful.

1. Disposable Plastic Collection Containers (Sterile Jars)

These are the same types used in laboratories and vet clinics. A sterile container ensures the sample stays free from:

  • dust
  • litter debris
  • bacteria from the environment
  • moisture contamination

Why vets prefer them:

Sterile containers preserve the chemical and biological integrity of the stool sample.
This is crucial for:

  • PCR testing
  • bacterial culture
  • Giardia antigen tests
  • parasite examination

What readers want:

A simple, hygienic way to store and transport stool with zero mess.

2. Poop Scoop Spoon or Disposable Spatula

Most vets provide a small plastic spatula in test kits.
This tool helps you:

  • lift the stool without touching litter
  • Scrape off only the necessary portion
  • collect from the centre, where contamination is minimal

Why it’s important:

The outer layer of stool often touches litter, but the centre stays clean.
A small spoon allows you to extract an uncontaminated portion even if some litter is stuck outside.

What readers learn:

You don’t have to throw the whole stool away if a little litter is stuck—just collect from the cleaner inside.

3. Disposable Gloves (Nitrile or Latex-Free)

Gloves are essential for maintaining cleanliness and safety.

Benefits:

  • Prevents transmission of parasites (Roundworms, Giardia, Coccidia)
  • Keep your hands clean
  • Avoids cross-contamination with household surfaces

Why vets recommend them:

Parasite eggs can survive for weeks. Handling stool directly is never advised.

What readers want:

A sanitary, easy way to pick up the sample without fear of contamination.

4. Non-Clumping Litter or Paper-Based Temporary Litter

When you know you’ll need a stool sample soon, vets often recommend switching to:

  • paper pellet litter
  • shredded newspaper
  • unscented non-clumping clay

These litters minimise contamination because they don’t:

  • stick to stool
  • form wet clumps
  • release dust
  • interfere with parasite eggs

What readers learn:

A temporary litter switch—even for 24 hours—helps you get a perfectly clean sample.

5. Litter Box Liners or Puppy Pads (Strategic Use)

If your cat is not anxious about changes, lining the litter box with:

  • a disposable liner,
  • a plastic sheet, or
  • a puppy training pad

can help you collect a fresh stool before it sinks into the litter.

How vets recommend using them:

Place the pad under a thin layer of litter.
Most cats will still use it normally, but you can lift the pad and access the stool directly.

What readers want:

A workaround that avoids digging through dirty litter.

6. Aluminium Foil “Landing Zone” (Vet-Trick for Fast Collection)

This is a trick many veterinary technicians swear by.

How it works:

  • Place a small piece of foil under a thin layer of litter.
  • When the cat poops, the stool lands on the foil instead of the litter.
  • You pick up the foil, remove the stool, and you’re done.

Benefits:

  • Zero litter contamination
  • Cheap
  • Disposable
  • Works even for picky cats

What readers learn:

A simple household item can help you avoid contaminated samples altogether.

7. Stool Collection Test Kits (Vet or Home Kits)

Some home testing services and many clinics provide complete kits that include:

  • a sterile jar
  • a scoop
  • gloves
  • preservative solution (for advanced tests)
  • instructions

Why vets love these kits:

They eliminate confusion about:

  • How much stool to collect
  • How to store it
  • How long can it remain usable
  • What to avoid

What readers want:

A ready-made kit that guarantees they won’t make mistakes.

8. Zip-Seal Bags (For Backup Protection)

While not a primary container, a zip-seal bag is great for:

  • double-sealing the container
  • preventing odor
  • avoiding leakage

Most vet clinics recommend placing the sterile jar inside a zip bag for transport.

Why this matters:

Protects the sample during transport and ensures the container stays uncontaminated.

Mistakes to Avoid When Preparing a Cat Stool Sample for a Vet Visit

Preparing a stool sample sounds simple… until something tiny goes wrong and your vet can’t use it. Many cat owners don’t realise that one small mistake can make the entire test inaccurate, forcing the vet to ask for a fresh sample again. That means more stress for you, more discomfort for your cat, and a delayed diagnosis.

Below is a reader-friendly, vet-informed guide to the most common mistakes people make — and how you can avoid every one of them with confidence.

1. Collecting an Old Stool Sample (More Than 12–18 Hours Old)

One of the biggest mistakes is assuming stool stays testable for days. It doesn’t.

  • Bacteria change over time
  • Parasites die or dry out
  • Moisture evaporates
  • Odour increases, and the sample becomes unreliable

Your vet needs a fresh sample, preferably within 6 hours, and no later than 12–18 hours.

Golden rule:
If you wouldn’t want to smell it again… your vet probably can’t test it.

2. Using the Wrong Container (Like a Shopping Bag or Tissue Paper)

Plastic grocery bags, paper towels, tissues, and bread bags — they all contaminate the sample.

When you use an unclean or absorbent container:

  • The stool touches unknown chemicals
  • Parasites may not survive
  • Faecal consistency changes
  • The vet can’t run accurate tests

Always use:

  • A sterile stool container from your vet
  • A small, clean glass or plastic jar with a tight lid
  • A ziplock bag ONLY if nothing else is available (not recommended)

3. Touching the Stool Sample with Bare Hands

Besides being unsafe, it also contaminates the sample.

Your hands carry:

  • Oils
  • Soaps
  • Bacteria
  • Dirt
  • Household germs

All these can alter the microscopic results your vet depends on.

Always wear disposable gloves during collection.

4. Collecting Stool Mixed with Litter

This is a huge mistake, and the most common one vets complain about.

Why this matters:

  • Litter absorbs moisture → sample dries out
  • Chemicals in clumping litter interfere with parasite testing
  • Vets reject samples with too much litter
  • Foreign particles hide important details under the microscope

Avoid this by:

  • Scooping only the solid piece
  • Brushing off loose litter grains
  • Using non-clumping litter the day before collection (optional but helpful)

5. Storing the Sample at Room Temperature

A stool sample left on a counter or in the car becomes useless very quickly.

Room temperature causes:

  • Rapid bacterial growth
  • Parasite eggs to dying
  • Odours to intensify
  • Sample decomposition

Correct storage:

Refrigerate the sample (never freeze it).
Keep it sealed in an airtight container.

Small Mistakes = Incorrect Results

Readers want clarity, and the truth is simple:

Your vet depends on a clean, fresh, properly stored stool sample to detect diseases like:

  • Giardia
  • Roundworms
  • Hookworms
  • Bacterial infections
  • Digestive disorders
  • Food sensitivities

Avoiding these small mistakes means faster diagnosis, better treatment, and a healthier, happier cat.

How Much Litter Is “Too Much” for a Stool Sample Submission?

When it comes to stool samples, a little bit of litter is normal — but too much litter can immediately ruin the sample. Most cat owners don’t realise how sensitive vet tests are, especially for parasites and bacterial infections. Even a small mistake in the amount of litter attached can make the test unreadable.

Here’s the simple, vet-approved rule:

The Ideal Amount of Litter: As Little As Possible

A stool sample should be mostly stool — 95% stool, 5% or less litter grains.

This means your vet expects:

  • A solid piece of stool
  • With only a few stuck grains of litter
  • Not surrounded by a full scoop of litter
  • Not coated in layers of clumping dust

If the sample is fully covered, your vet may need to reject it.

Why Too Much Litter Makes the Sample Useless

Even though litter looks harmless, it can interfere with diagnostic testing in several ways:

  • Clumping litter absorbs moisture, drying out the stool and affecting parasite detection.
  • Scented litter contains chemicals that can distort bacterial readings.
  • Large amounts of litter hide worms or eggs under the microscope.
  • Dust from litter creates debris, making the smear slide unreadable.

The more litter mixed into the poop, the higher the chance that the vet cannot analyse it properly.

How to Know If Your Sample Has “Too Much” Litter

A sample has too much litter if:

  • You scooped litter along with the poop
  • The poop is coated like a sugar-doughnut
  • Half the container is filled with loose litter
  • You cannot see the natural colour or texture of the stool
  • The scoop contains more litter than stool

A good sample is clean, visible, and mostly intact.

How to Reduce Litter on the Stool Without Contaminating It

Here are simple methods owners use successfully:

  • Lift the stool gently with a clean scoop and let loose litter fall off
  • Tap the scoop lightly to shake off extra grains
  • Use non-clumping litter 24 hours before sample day (highly effective)
  • Pick from the top of the stool, not the side buried in litter
  • Avoid scraping — this breaks the stool and mixes litter into it

Step-by-Step Guide to Packaging a Cat Stool Sample for Laboratory Testing

Preparing a cat stool sample for the lab doesn’t need to be complicated. What matters most is clean handling, freshness, and proper sealing. Follow this simple step-by-step guide so your vet gets a sample that’s accurate and easy to test.

1. Use a Clean, Vet-Approved Container

Always use the sterile plastic container your vet provides.
If you don’t have one, choose a small, airtight, disinfected container that closes tightly to avoid contamination.

2. Collect a Fresh Sample (Within 4–6 Hours)

Fresh stool offers the best chance for detecting parasites, bacteria, or digestive issues.
Avoid samples older than 12 hours unless your vet specifically allows it.

3. Scoop the Stool Carefully

Use a clean disposable spoon or scooper to lift the stool.
Let loose litter fall away naturally, and only place the cleanest part into the container.

4. Fill Only 1 Teaspoon

Vets don’t need a full scoop —
A grape-sized amount is perfect for most tests.

5. Seal the Container Tightly

Close the lid firmly to prevent leaks and keep the sample from drying out.
A dry sample is harder to analyse and may need replacement.

Home Test Kits vs. Vet Labs: Which Accept Stool Samples Containing Litter?

When it comes to stool samples, not all testing options treat litter the same way. Some allow a small amount of litter, while others strictly reject contaminated samples. Here’s a simple breakdown so cat owners know exactly where their sample will be accepted.

Home Test Kits: More Flexible With Litter

Most at-home stool test kits are slightly more lenient.
They understand that cat owners don’t always collect a perfectly clean sample, so:

  • A small amount of litter stuck to the stool is usually acceptable
  • Clumps, dust, or heavily coated stool are still NOT allowed
  • Instructions often include reminders to collect from the top of the stool

Home kits focus on convenience, so they tolerate minor contamination without rejecting the sample immediately.

Vet Labs: Much Stricter About Litter

Veterinary laboratories follow professional diagnostic standards, so they need a cleaner sample. This means:

  • Only minimal grains of litter are acceptable
  • Clumping litter or scented litter may cause rejection
  • Too much litter makes parasite detection unreliable
  • Highly contaminated samples may require a redo

Vets prefer the sample to be as litter-free as possible for accurate microscopy.

Which Option Is Better for You?

  • Choose home test kits if you want convenience and can manage a slightly imperfect sample.
  • Choose vet labs if you need deeper diagnostic accuracy, especially for recurring diarrhoea, worms, blood, or sudden illness.

Both can work — but the cleaner the sample, the more reliable the results in any setting.

Why Your Vet Might Ask for a Fresh Litter-Free Stool Sample & How to Provide One

Vets often request a fresh, litter-free stool sample to ensure the most accurate results. Even small traces of litter, clumping particles, or scented chemicals can interfere with:

  • Parasite detection
  • Bacterial culture results
  • Digestive disorder analysis
  • Giardia or other antigen testing

A contaminated sample may produce false negatives, hide critical signs, or force your vet to repeat the test, delaying treatment.

How to Provide a Fresh, Litter-Free Sample

  1. Switch to non-clumping or paper-based litter at least 24 hours before collection.
  2. Collect the stool immediately after your cat defecates — preferably within 4–6 hours.
  3. Use a clean scoop or disposable spatula to lift the stool, removing any loose litter grains.
  4. Place a small portion (about a teaspoon) into a sterile container, seal it tightly, and label it with the cat’s name, date, and time.
  5. Refrigerate until delivery, but do not freeze.
  6. Deliver to the vet as soon as possible to maintain accuracy.

Vet-approved Products For You

  • Juvale 50 Pack Stool Sample Collection Kit

A bulk pack of sterile plastic containers (50‑pack), suitable for cats or dogs. Great if you plan to do regular stool checks (parasite screening, lab submissions, etc.). Helps you collect samples hygienically without touching the stool directly.

  • MySimplePetLab Cat Stool Test Kit

A home stool‑test kit (vet‑approved) that lets you collect, mail, and test cat stool from home. Handy if it’s hard to visit a vet promptly or you want to monitor parasites/intestinal health regularly.

  • SZSMW 50 Faecal Sample Tubes for Pets

Disposable sample tubes with screw caps and attached scoops: good for clean, leak‑proof stool collection and short‑term storage or transport. Useful if you want to collect multiple samples over time.

  • Obami 12‑Pack Faecal Diagnostic Kit for Cats & Dogs

A smaller, more compact sample‑collection kit — useful if you want a ready-to-use option without buying bulk packs. Handy for occasional testing or if you have fewer pets.

Further Readings You May Need

Why Is My Cat Peeing Outside the Litter Box?

Litter Box For Maine Coon Cats

how to pick a puppy from a litter

FAQs

What happens if a cat stool sample has litter on it?

If a cat stool sample has litter on it, the contamination can interfere with parasite detection and lab testing. Clumping litter absorbs moisture and may trap parasite eggs, while scented or chemical-laden litter can alter bacterial or antigen results. Minor, unscented litter specks may still be usable, but the cleanest portion from the stool’s centre is preferred to ensure accuracy.

How to collect a cat stool sample without litter contamination?

Use a sterile container, disposable scoop, and gloves. Collect the stool immediately after your cat defecates, pick from the centre portion, and avoid clumping or scented litter. Temporarily switching to non-clumping litter or paper-based litter 24 hours before collection can minimise contamination. Refrigerate the sample and deliver it promptly.

When should I provide a cat stool sample to the vet?

Ideally, provide a sample within 4–6 hours of collection. For best results, no later than 12 hours, especially if the cat is on medication or has diarrhoea. Fresh stool preserves parasite eggs, bacteria, and stool consistency, ensuring accurate faecal testing, parasite detection, and antigen tests.

Why do vets reject stool samples with too much litter?

Vets reject heavily contaminated samples because clumping or scented litter can:
Absorb the flotation solution
Trap parasite eggs
Alter bacterial cultures
Interfere with antigen or PCR testing
Even minor contamination can reduce accuracy, but excessive litter often results in false negatives or delayed diagnosis.

Where is the best place to collect a cat stool sample?

Collect the stool from a clean litter-free area if possible, or temporarily use a non-clumping or paper-based litter tray. Some vets recommend placing aluminium foil or puppy pads under a thin layer of litter to catch fresh stool, keeping it free from clumps or chemical contamination.

Who should handle a cat stool sample?

Anyone collecting the sample should wear disposable gloves and avoid touching the stool directly. Using vet-approved scoops or disposable spatulas prevents contamination. Children or untrained individuals should avoid handling it to reduce the risk of parasite exposure.

How much litter is acceptable on a stool sample?

The maximum safe contamination is 5% of the sample or just a few grains. Anything more can affect parasite testing and lab accuracy. The best practice is to scoop only the central portion of the stool, which is least likely to have litter attached.

Wrap Up-Ensuring Accurate Cat Stool Testing Starts With Litter-Free Samples

Collecting a clean, litter-free stool sample is more than just a chore—it’s a critical step in keeping your cat healthy. Whether you’re submitting a sample for parasite screening, bacterial culture, or advanced diagnostic testing, even minor contamination from clumping or scented litter can lead to false negatives, delayed treatment, or repeated vet visits.

By following the vet-approved methods outlined in this guide—using sterile containers, disposable scoops, gloves, and temporary non-clumping litter—you can provide your vet with a fresh, uncontaminated sample. Remember, the centre portion of the stool is your best bet, and delivering it promptly keeps parasite eggs and bacteria intact for accurate results.

I write with love and care, keeping your furry friend’s health first and following the doctor’s guidance. If it helps, share it—because health and knowledge grow stronger when we share them within our community. My words are carved in stone — I truly worship my cat. Everything I share with you here comes straight from my cat’s own wisdom. That’s why I encourage you to share this blog as much as possible! Also, let me tell you — this is a top-quality blog, so make sure to read it completely to get the most benefit and keep your cats happy and healthy. A cat is the light that brightens every home.

Leave a Comment

Your email address will not be published. Required fields are marked *

X
Scroll to Top
Available for Amazon Prime